How to save a drowning person - key points
No one is immune from accidents, so you should always be ready to help. This article will describe in detail all the necessary actions that need to be taken to successfully rescue a person drowning in a pond.
First actions when seeing a drowning person
- When you see a drowning person, the first thing you need to do is notify specialized rescuers.
- If possible, throw a lifebuoy, an inflatable mattress, etc. to the drowning person.
- If you decide to swim to the drowning person yourself, you should remove as much outer clothing as possible, since it will only get in the way.
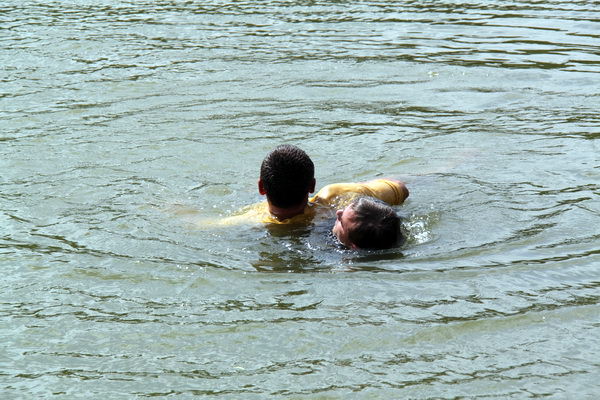
How to swim to a drowning person
- You need to swim up to a drowning person only from behind, because a person who is drowning is in a stressful situation and has practically no control over himself. He can grab onto his rescuer with considerable force and pull him to the bottom;
- If you cannot swim invisible to a drowning person, you need to dive a couple of meters before him and, swimming up to the drowning person, grab him. Thus, the victim will not be able to harm either himself or his rescuer.
Capturing and transporting a drowning person
Methods of transportation depend only on the condition of the person who is drowning.
If the drowning person remains relatively calm, can control his body and obeys the advice of the person saving him, then he can be brought to land using this method: you need to swim on your stomach with breaststroke, and the drowning person should hold on to the rescuer’s shoulder, while lying on the water and helping The rescuer moves forward with small jerks with his legs.
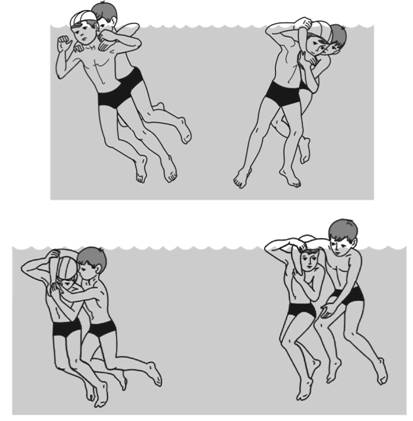
If the person who is drowning is in shock or panic and does not understand what is being said to him, then it is better to use the following types of transportation:
- Turn the person around and press him towards you, firmly grabbing him by the armpits or chin. Swim breaststroke on your back or side in this position.
- Turn the person's back to you and grab him by the armpits or head, swim breaststroke on your side in this position.
- Turn the person being rescued onto his back, grab him by the armpit with one hand and, clasping his forearm on the other side, swim on his side, rowing with his unoccupied arm and legs. This is the most difficult type of transportation and is used only when the drowning person is very scared.
- If a person is already submerged at the bottom of a reservoir, then he will need to dive and swim along the bottom where the victim may presumably be located.
- Having found a drowning person, you need to grab his armpits or arms, then push off with force from the bottom and emerge to the surface of the water, working as quickly as possible with your legs and unoccupied hand.
Having emerged, you should turn the person’s back to you and, without hesitating a minute longer, swim with him to the nearest shore:
- If a drowning person is at the bottom of a reservoir facing the bottom, then you need to swim to him from the feet.
- If he is at the bottom face up, then you need to approach him from the side of the head.
How to catch more?
Over 7 years of active fishing, I have found dozens of ways to improve the bite. Here are the most effective ones:
- Bite activator. This pheromone additive attracts fish most strongly in cold and warm water. .
- Promotion gear sensitivity. Read the appropriate manuals for your specific type of gear.
- Lures based pheromones.
Techniques with which you can effectively free yourself from the uncontrollable grip of a person drowning in a pond
- If a drowning person makes holds that are unsafe for a rescuer, then you need to take in air and dive to the depths with him. In such circumstances, the drowning person will still try to stay at the top of the reservoir and let his rescuer go. But if this technique does not work, then you must immediately use other techniques so as not to go under the water yourself and lose your balance.
- When grabbing a leg, you need to grab the drowning person’s head with one hand and the chin with the other. Quickly turning the drowning person's head to one side and to the side in this way will free himself from the grip. If this helps, then you need to push off with your non-grabbed leg.
- When grabbing the back of the neck, you need to grab the victim by the hand. With your palm, support the elbow of the drowning person’s arm and, quickly raising his elbow up, and turning his hand down, will free himself from such a grip. After this, you do not need to let go of the victim’s hand, but continue to turn him with his back to you.
Providing first aid to a drowning person on land
First aid to a rescued person who is already on land must be provided depending on the degree of complexity of his condition. The first thing to check is the presence of breathing and pulse. If these indicators are normal and he is conscious, then the victim should be placed on a flat area so that the level of the head is slightly lower than the pelvis. Then you should free him from all wet clothes, wrap him in a blanket and call the doctors. It is also allowed to give a person warm tea.
If a person remains unconscious even after removing the fluid, but breathes rhythmically and has a clear pulse, then you need to act in this way:
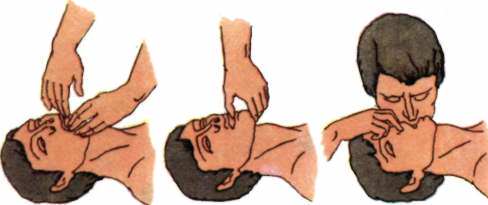
- Raise the rescued person's head up and push back his lower jaw.
- Place your head slightly below the level of the pelvis and, using your own index finger wrapped in a scarf, clear the oral cavity of dirt, algae, remnants of vomit and other contaminants.
- Bring the rescued person to consciousness using alcohol for ammonia.
- Find a doctor.
If the rescued person has no breathing, no pulse and lies unconscious and unconscious, then this is the most dangerous condition that can result in the death of a person. To prevent death in such circumstances, and to act correctly, you must first determine the type of drowning, a characteristic feature of which is the color of the skin of the drowning person.
There are two of them:
- "White."
- "Blue."
If a person has a white skin color, then this is a “white” or “false” drowning. The breathing of these drowned people was interrupted due to a spasm of the glottis under the influence of a reflex on it when liquid enters. This type of drowning is easier to deal with and the chances of survival are much higher.
If a drowned person has bluish skin or skin with purple spots or tints, swelling (especially in the area of the lips and cheeks), then this is most likely a “blue” or “real” drowning. The breathing of such drowned people stops due to the infusion of fluid first into the lungs and then into the blood, which immediately contributes to the complete shutdown of the heart. A characteristic sign of this drowning is also very swollen veins and profusely diverging foam from the mouth area.
The action plan for helping these people looks like this:
- Establishing good airway openness. To do this, you need to clean your mouth of all kinds of contaminants that interfere with the normal passage of air (grass, algae, silt and others). But it often happens that the jaws of a drowning person are clenched in a spasm, and to open his mouth you need to use the following methods:
- A teaspoon is inserted between the jaws of the rescued person into the area of the molars, after which the jaws are opened.
- With the help of four fingers inserted into the molar area, you can also open the jaws.
- In order to prevent a person’s jaws from closing again, you need to put some non-dangerous object between them (a scarf, a knot from a scarf, etc.). After completing the task of opening the mouth of a drowning person, you need to turn his head to the side and, with your index finger wrapped in a scarf, clean the mouth, nose and nasopharynx of all contaminants.
- Then remove the entered fluid from the lungs of the drowning victim. To do this, a person is turned onto his stomach and placed on the knee of his half-bent leg so that his head is slightly below the level of the pelvis. Then, with the help of your hands, the lower chest area of the victim is compressed. This procedure should be done no longer than 15 seconds, after which you should proceed to performing artificial respiration.
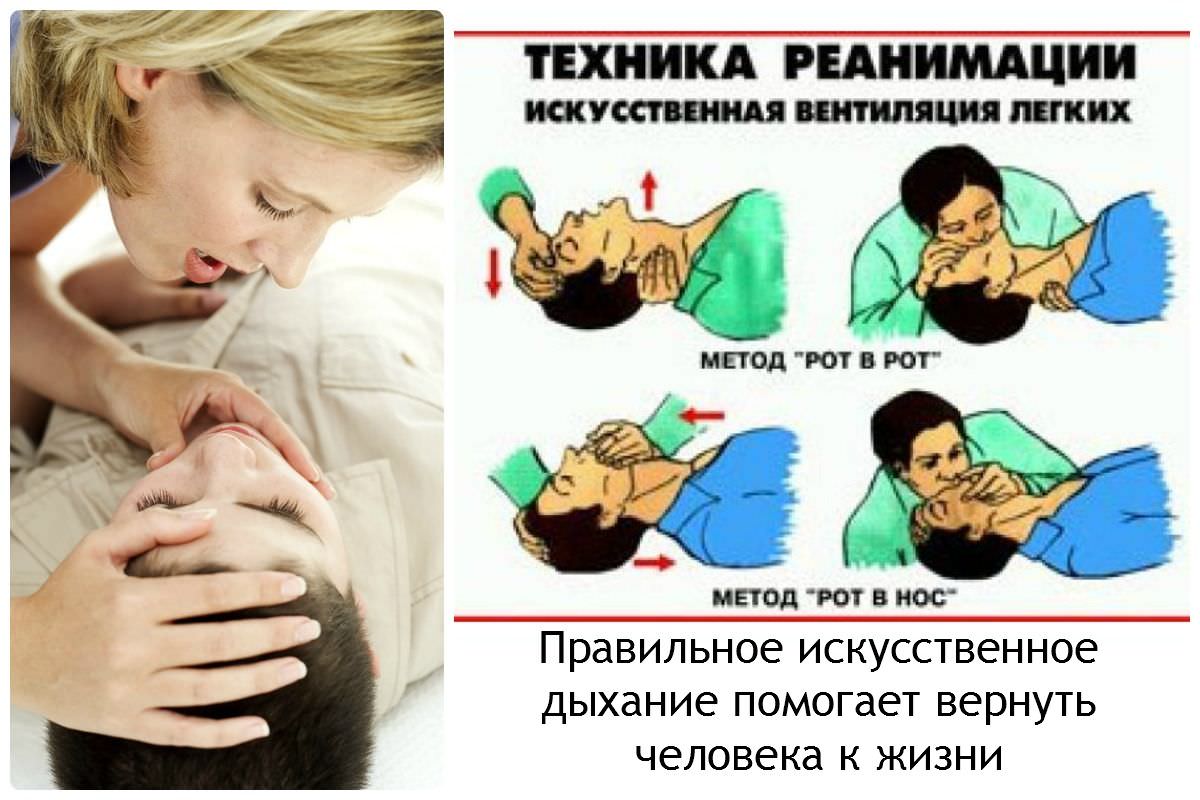
Artificial respiration and indirect cardiac massage are done in combination, so they are carried out almost simultaneously with the victim in the following order:
- The victim is placed on a hard surface, since on a soft surface during cardiac massage there is a risk of liver damage. Remove the belt and free the chest from excess clothing with buttons, fasteners, etc.
- The rescuer places his hand, palm down, on the victim's lower chest so that the axis of the wrist joint is the same as the long axis of the sternum. The rescuer places the other hand on the outer area of the first hand. In this case, all fingers on both hands should be slightly raised so that they do not come into contact with the chest during the massage. Any other position of the hands is unacceptable as it may be dangerous for the victim.
- Then the rescuer leans towards the victim and, with clasped hands, sharply presses on his chest. In this case, it is necessary that the pressure is not in the left zone of the chest, but in the middle (in the sternum). The pressing force should be no more than 50 kg, so this massage should be achieved not so much through the strength of your hands, but through your own body weight.
- After briefly pressing on the chest, you need to release it so that the heart can relax after such pressure.
- The rate of cardiac massage for adults is 65-70 shocks every 60 seconds. Children under 7 years of age should be massaged with only one hand, and infants with two fingers (index and middle) with a frequency of up to 100–110 thrusts per 60 seconds.
After each session of chest compressions, you need to perform artificial respiration.
This is done this way:
- The head of a drowning man is thrown back upward.
- The rescuer draws air into his lungs and holds the exhalation a little, after which he closes both of the victim's nostrils (so that the air cannot escape from them) and tightly clamps the mouth area with his lips.
- The rescuer then takes a quick breath into the victim's airway.
- After completing the inhalation, the rescuer moves away from the person.
- In the breaks before the next breath, the rescuer needs to take a couple of normal breaths for himself. After this, the process of performing artificial respiration is repeated again.
The frequency of breaths that a person needs to take during emergency resuscitation:
- Adults need to inhale air at least 12–16 times every 60 seconds.
- Children 25–30 times every 60 seconds.
- For young children - 40 exhalations every 60 seconds in small portions into the nose and mouth.
How to prevent drowning
To prevent disaster, you need to remember the following:
- If, while swimming in a pond, you realize that you have not calculated your strength and are starting to drown, then, first of all, you need to try to relax and lie on your back, and then call someone for help.
- Children should not be allowed to bathe independently without adult supervision.
- You cannot dive headfirst into unfamiliar bodies of water without knowing the proper depth and bottom.
- You should not swim while intoxicated or immediately after eating.
- It is not recommended to swim near bridges, cliffs, underwater holes, etc.
- You should not enter the pond after being in the sun for a long time, or if you are very tired.
- You should not rush to the aid of a drowning person if you are a poor swimmer or simply unsure of your abilities.
- During transportation of the victim, you should ensure that his mouth and nose are constantly above the water level - this will protect the person from additional infusion of liquid.
- During artificial respiration, a lot of air enters the person’s stomach and bloating occurs, which can delay the onset of consciousness, so you need to periodically apply a little pressure on the victim’s pancreas in order to free it from excess air.
- You cannot press on the chest and blow air into a person at the same time. This should be done alternately: 5 presses and one inhalation.
It might be useful to read:
- Beaver catching at different times of the year;
- Emergency assistance for drowning;
- How to behave in a thunderstorm. Safety regulations;
- How to make a fish dryer with your own hands;
- Medical glue "bf";
- The first sensible review of dry rations from a woman;
- The best steel for a hunting knife;
- Do-it-yourself sundial: decorate the dacha and kindergarten playground;