How to make a fish dryer with your own hands
The idea to make a dryer came to me immediately after I finished renovating my house. There were a lot of different unused materials left that could be used for this project. And, to be honest, I’m tired of drying fish on ropes and wires covered with gauze. Firstly, this is extremely inconvenient, and secondly, such a primitive method of drying does not completely exclude its infestation by flies, which, you see, is no good.
Materials
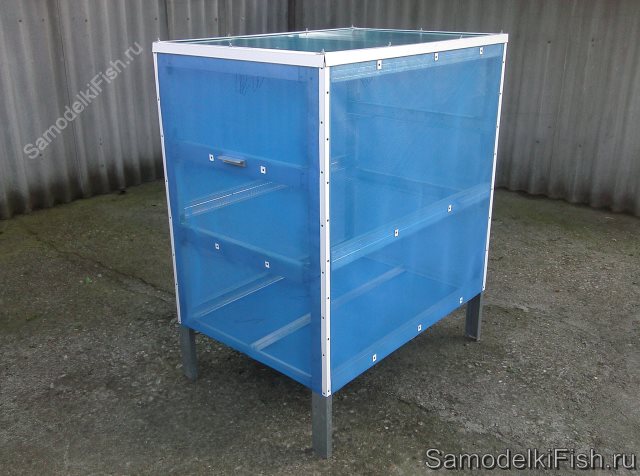
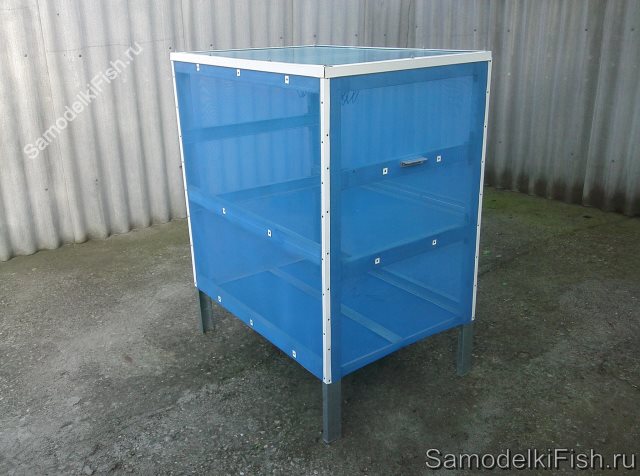
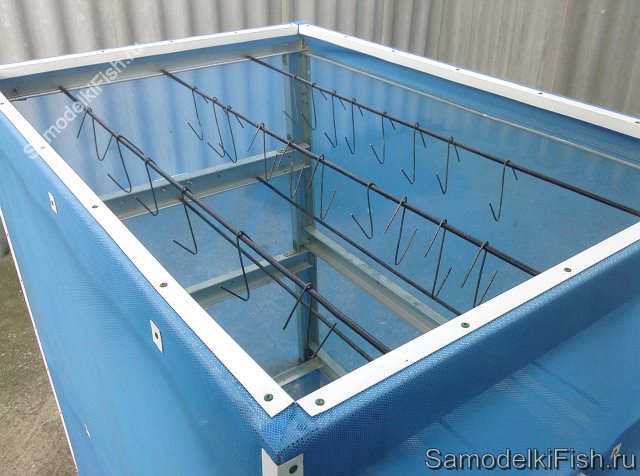
So, what should the ideal dryer be? Thinking over the future design in my head, I tried to get a durable, light and spacious box in which I could dry various fish, both large (balyk) and small, for example, roach. Therefore, as the material for the frame, I chose a profile used for installing drywall and an aluminum corner. I decided to cover the side walls and bottom of the dryer with a thick plastic mosquito net.
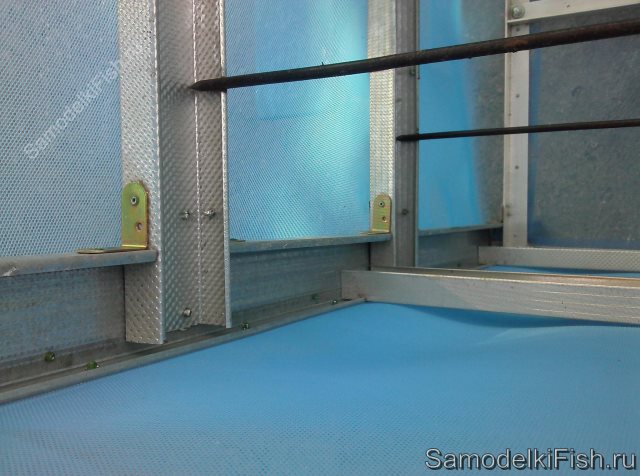
I immediately planned to make the lid also from a mesh, but a neighbor suggested (many thanks to him) that a fly can lay eggs through the upper holes without even contacting the fish. To avoid such troubles, I made it from polycarbonate and a decorative metal corner, and it turned out to be a feast for the eyes. All components of the dryer were secured with rivets and small bolts with nuts and washers of the appropriate size (diameter 5 mm). That's basically all the materials. Oh yes, for better fixation of the mesh at the corners of the structure you will need another plastic corner (2/2 cm).
Tools
Making a drying box with your own hands took only two days, and incomplete ones at that. I worked slowly, enjoying the process. To make this idea a reality, I needed the following tools:
- cordless drill;
- Bulgarian;
- riveter;
- pliers;
- wrenches;
- scissors;
- stationery knife.
Dimensions
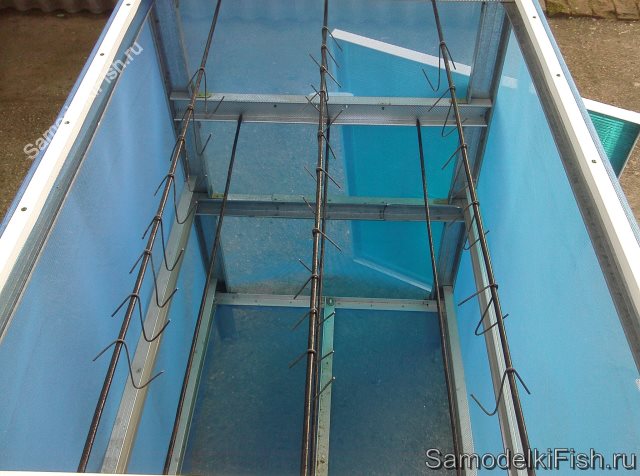
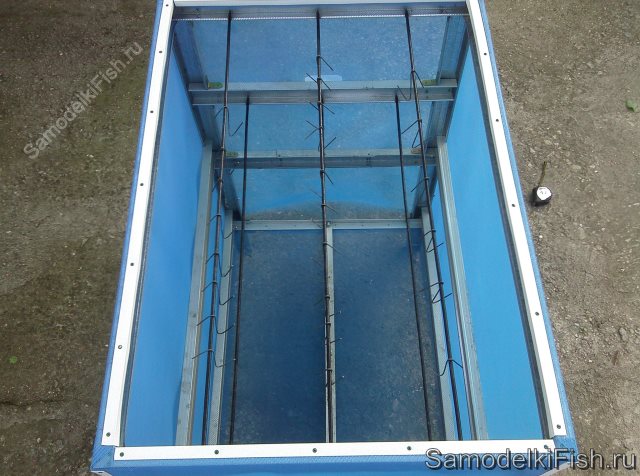
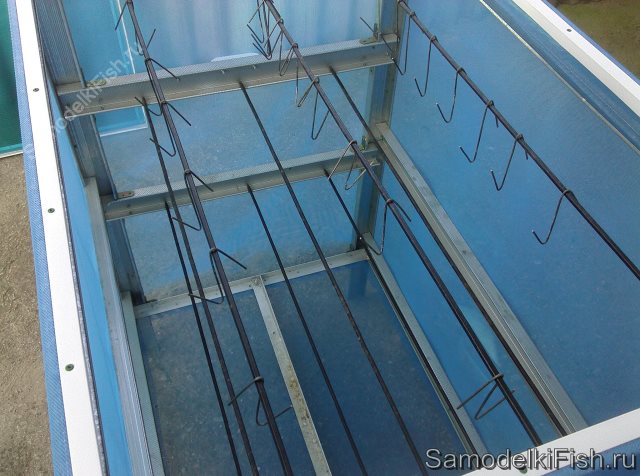
The dimensions of my dryer are: height - 1.2 meters, length - 1 meter, width - 70 centimeters. Why are they like this? These figures, of course, were not taken out of thin air. When deciding on the size of the box, I thought about how to make loading and unloading fish as convenient as possible. Given my height (180 cm), these parameters turned out to be optimal. The drying chamber turned out to be spacious, consisting of three levels, each of which has three metal rods for hanging fish. In it you can wither a hundred weighing 0.3 kg or five hundred pieces at a time. Agree, not bad at all.
Installation
Conventionally, all work can be divided into three stages:
- frame assembly;
- lining the box with mesh;
- production of the lid.
First of all, I made blanks from the profile. To do this, I cut it with a grinder as follows: four 1.2-meter-long sections (for corner supports), six meter-long and the same number of seventy-centimeter crossbars. Then, at a distance of 20 cm from the floor, I alternately fastened the blanks together using rivets. In order for the parts to fit better together, the profile at the joints must be adjusted by making small cuts on the side surfaces. As a result, I ended up with a rectangle standing on legs.
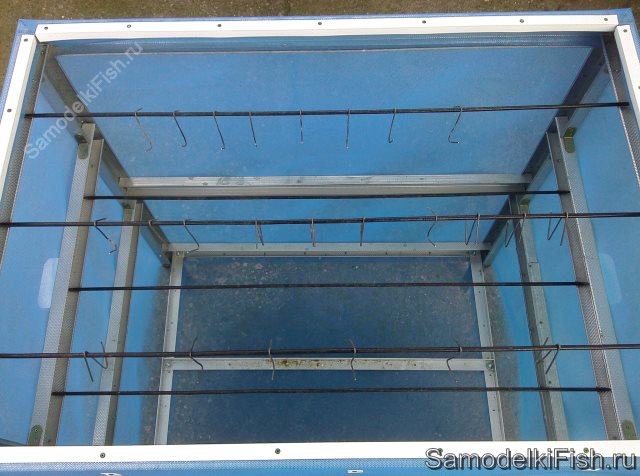
The top and middle of the structure were assembled in the same way. I additionally reinforced the bottom of the box with an aluminum corner, which I screwed from the inside. Thanks to this, the dryer acquired additional rigidity. An important nuance: the profile should be mounted so that its outer surfaces form an ideal plane with each other. Subsequently, this will greatly facilitate the process of installing the mesh.
Actually, to implement the second stage, it is advisable to have an assistant. I was lucky in this sense; my wife agreed to help. It was much more convenient for two people to work with the mosquito net: she held it where it was needed, and I secured it. It is better to cut the mesh for each side with a small margin so that you can wrap it a little inward, thereby improving the overlap with the adjacent canvas. The main task in this matter is to close all possible cracks so that flies cannot reach the fish.

Do-it-yourself fish dryer is ready
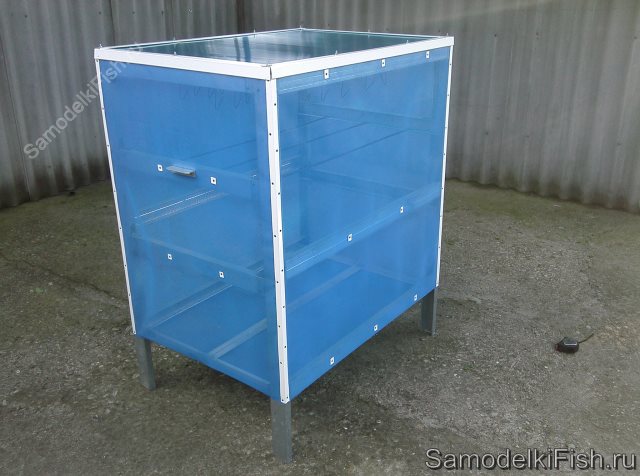
Making the lid was also easy. Having cut out a piece of polycarbonate (0.6 mm thick) of the appropriate size with a stationery knife, I screwed it to the frame from the decorative corner with small bolts. It turned out beautiful and reliable. This lid is easy to remove and put on, and most importantly, it completely eliminates the possibility of contamination of the product from above.
Conclusion
Finally, dear readers, I would like to draw your attention to a few tricks that will help you not only speed up the process of drying fish, but also improve its quality.
Firstly, it is advisable to load it into the dryer at night (at this time it is cool outside, and there are no annoying flies).
Secondly, during the first 24 hours it must be blown with a fan, this will significantly speed up drying and eliminate the unpleasant odor.
Thirdly, do not even try to dry large roach, bream or crucian carp in uncut form in the heat. In summer, the insides of these fish are full of greenery, which, under the influence of high temperatures, begins to rot, which inevitably leads to their spoilage.
It might be useful to read:
- Beaver catching at different times of the year;
- Emergency aid for drowning;
- How to behave in a thunderstorm. Safety regulations;
- How to make a fish dryer with your own hands;
- Medical glue "bf";
- The first sensible review of dry rations from a woman;
- The best steel for a hunting knife;
- Do-it-yourself sundial: decorate the dacha and kindergarten playground;